Cheesecake has long been celebrated for its creamy, indulgent texture, while cookies are the epitome of comfort and nostalgia. Put the two together, and you get a dessert that feels both elegant and playful: Cookie Cherry Cheesecake. With a crunchy cookie crust, velvety cheesecake filling, and a sweet-tart cherry topping, this recipe is as beautiful as it is delicious. It’s the kind of treat that fits right in at a holiday table, a birthday celebration, or even as a weekend baking project for those who love to spoil themselves with something decadent.
Why You’ll Love This Cheesecake
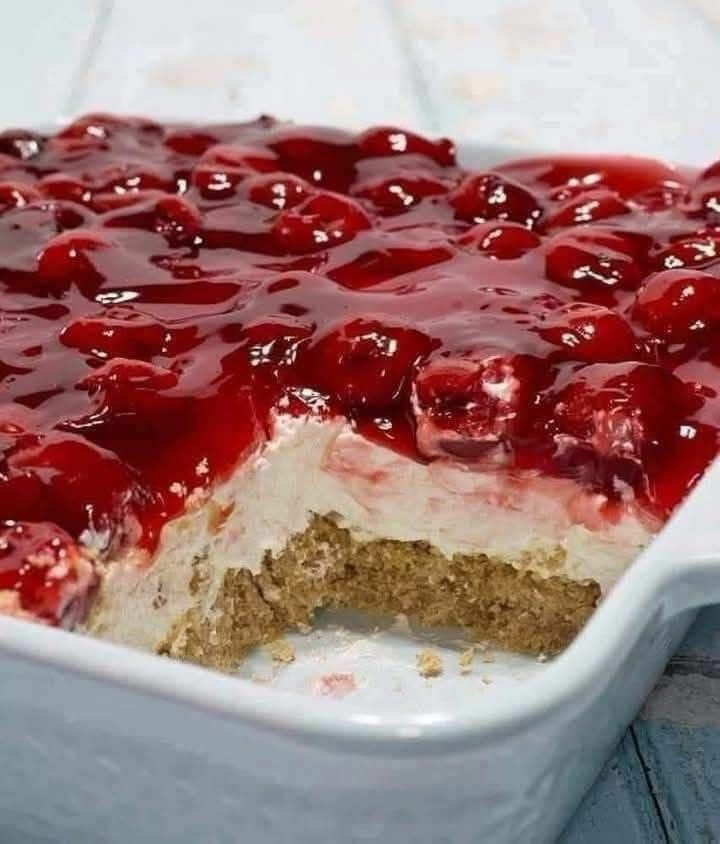
This recipe isn’t just another cheesecake—it’s layered perfection. The buttery cookie crust adds a delightful crunch, the cream cheese filling delivers that signature melt-in-your-mouth richness, and the cherry topping ties it all together with fruity brightness. The cherries also add a gorgeous ruby-red finish, making the cake a showstopper without requiring hours of complicated decoration.
Ingredients:
For the crust:
2 cups crushed chocolate sandwich cookies (about 20–22 cookies)
¼ cup unsalted butter, melted
For the cheesecake filling:
3 packages (8 oz each) cream cheese, softened
1 cup granulated sugar
3 large eggs, room temperature
1 tsp vanilla extract
½ cup sour cream
For the topping:
1 can (21 oz) cherry pie filling
Instructions:
Prepare the Pan Preheat your oven to 325°F (163°C). Grease a 9-inch springform pan and line the bottom with parchment paper for easy removal.
Make the Crust In a bowl, combine crushed cookies and melted butter until the crumbs are evenly coated. Press firmly into the bottom of the prepared pan to form a crust. Chill in the refrigerator while preparing the filling.
Mix the Filling In a large mixing bowl, beat the cream cheese until smooth and creamy. Add sugar and beat until fluffy. Mix in eggs one at a time, followed by vanilla and sour cream, until just combined. Avoid overmixing to keep the cheesecake from cracking.
Bake the Cheesecake Pour the filling over the crust. Place the springform pan in a larger roasting pan and add hot water until it reaches halfway up the sides of the cheesecake pan (water bath method). Bake for 55–65 minutes, or until the center is set but still slightly jiggly.
Cool and Chill Turn off the oven and let the cheesecake cool inside for 1 hour with the door slightly open. Remove from the oven, then refrigerate for at least 4 hours or overnight to firm up.
Add the Cherry Topping Spoon cherry pie filling evenly over the chilled cheesecake before serving.
Serving Suggestions
Serve slices as-is for a classic presentation. For extra indulgence, drizzle with melted chocolate or sprinkle with cookie crumbs. Pair with coffee or a glass of cold milk for a perfect finish.
Tips & Variations
Cookie options: Use chocolate sandwich cookies for a richer crust or graham crackers for a more traditional base. Fruit swap: Swap cherry pie filling with blueberry, strawberry, or raspberry for a different twist. Mini versions: Divide the recipe into muffin tins lined with paper cups to make mini cheesecakes—perfect for parties. No-bake shortcut: Use a no-bake cheesecake filling and chilled cookie crust for an even quicker version.
Storage & Make-Ahead
Refrigerator: Store covered in the fridge for up to 5 days. Freezer: Freeze slices individually wrapped in plastic wrap and foil for up to 2 months. Thaw in the fridge overnight before serving.
Final Thoughts
The Cookie Cherry Cheesecake is everything you want in a dessert: creamy, crunchy, fruity, and utterly indulgent. It looks stunning, tastes even better, and is surprisingly simple to make. Whether you’re baking for a holiday gathering or just craving something extra special, this cheesecake is guaranteed to become a favorite in your recipe collection.